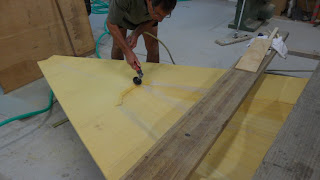
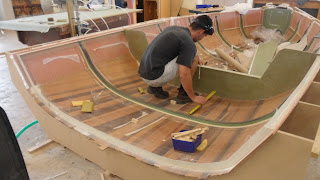
We did few stiffeners and filled the gap underside of the cabin top.
We came across this corner when extending this bit of vac bag yesterday and put some bits of perforated release film on the corner for preventing the hole made on the bag.
This is a jig for laminating underside of prowtube which is down half of it. It will be pretty hard to get our hands into the space when the tube goes on apparently. What if the jig was rather a female one rather than this?
We ground that shelf and sanded the sanded surface again because it wasn't quite fair enough.
Well done.
Canbon is folded a little bit. Could we find another better way to do this? If we made deck frames highenough to do this, we didn't have to extand this so that we could have glued the bulkhead with laminated carbon uni and EDB 200 done already.
First layer is going on. It will be total 3 layers of EDB 400. The tricky thing was that it changed the shape longitudinally slipping on the plastic film on the mould.
It is better off not putting the hose tip onto the laminating material because it can be indented. We can do like this picture shifting the hose out of the material or making a dart and put the hose into it even with bleeder. Vac bag always is not enough so I reckon more than 1.5 times the length of material and over 2.5 times the width of material of bag wouldn't be too bad.
This stanchion is made of two(or one. I should have asked Andrew) layers of EDB 300 with rolling it diagonally and fixing it by masking tape at the ends of it. If we can afford to use heat shrinkable tube, we can use it.
0,90 oriental EDB 200 laminated
inside prow. prow tube is going to go through this.
good.
Chris has dryfitted three layers of carbon double bias winding around the prow tube with tripod foam, which looks like pretty tricky.
Forward deck camber is drawn on the bulkhead. Chris bored a hole on nose cone.
The camber shape is come from this shape transfered on a bit of wood.
cutting with a jigsaw
This is a job today. Lance is fitting the girder and the cockpit bulkhead on the underside deck.
The flange is rather lower than it is higher because it can be filled up with glue when it is low but if that is high, we can't lower the flange.
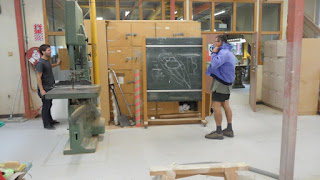
We are trying to figure out how we can cut the EDB for those shape on blackboard in an optimal way.
The last bits of stiffener
Smoko!!!
Putting on the deck, fitting those plates. It is getting there but they need to be lower, which means the cockpit side of the girder has to be sanded. They'd better to be made loose a bit rather than tightly because two layers of flanges will be going on those edges and glue will go between two surfaces as well. Lance made the flange using the deck underside as a jig.
That space between girder and the bulkhead is going to let the centre case as well as a small bit of girder in.
Prior to putting the deck on, pre-do the flange inside prow. The concept is similar to the flange we did on topside. This bit of wood has some plastic tape on it, which can prevent coving sticking on the wood. We used 403 adhesive micro fibre instead of using 410(because it is ran out), it was done well on the plastic tape.
Two bits of jig will be on each side with these jig hanging on the topside. We need to cove underneath of the corner of them.
This is a sketch of prow and prow bulkhead but I can't see well.
Nice.
It is ready to be laminated.
Lance put a peel ply far down on the hull, put vac bag on it, put another peel ply on it and laminated. We can see a piece of cardboard maked a line.
We used a torch lighting behind this bulkhead because we can see the line where the carbon unis running down. Those carbon unis on each side will pretty perfectly face each other.
Why are those long bits cut?
We are mixing resin to get inside fairing and to re-cove on inadequate part.
The flanges for cock pit bulkhead are done.
Where did Lance made this flange to use? That glass plate is glued up with two plates of 8mm thickness glassplates, which is going to be the mast plate.
Last photo of the underside of cabin top.
coving on the corners made by jig inside prow. We are going to make flanges on them.
Nice position.
Good coving.
Good as the jig Lance made before on topside and the idea of this is actually same.
There will be a diagonal bulkhead inside prow to prevent the seawater coming through the hole for the fuller on bow deck.
We dropped few 4mm bid of glue alongside on the flange to get the proper high. What is going to be done later on?
We have had an experiment regarding the vac tape stuck onto foam and EDB, because when the vac tape stuck on them it is quite an hassle to get rid of it. We put some slurry on the foam and covered it with peel ply. The conditions will be 1. on the surface peeled the peel ply off 2. even on the peel ply itself.
Lance is doing another experiment with using just some plastic on the foam.
It worked.
This is the handle going alongside of the top corner of each frame. I realised this is quite convenient.
chinagraph
methods to prevent/to drain seawater coming into prow-tube
o-ring
use a tray behind the collision bulkhead
a sock, a funnel connecting to centre case
bilge pump
How are we going to seal the centre case when we laminate outside hull after turning over it.
fastner
tap
sealing
ceiling
tap-epoxy-Gougeon Bros.


댓글 없음:
댓글 쓰기