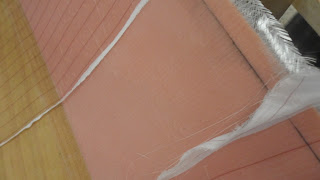
Coving bow chine, we glued up the floor at stern.
Glue has gone off well cheking this morning, we are talking about the way the bulkhead set in the situ. ADR dries 95% at the room temperature and 5% has to be cooked to go off at higher temperature but that can be solved by the time going(6 month~1 year will be enough.) which related to money. This bulkhead shown on the picture is a pattern and a straight edge is sitting on the frames.
Peel the peel ply off where the floor goes onto. Cut each point, tear as it goes with the grain. The reasone of the red line being on the peel ply is to notify the peel ply is covered on it. Sometimes, it really happens that people laminate another fibreglass onto the peel ply, which is disaster.
The surface under the peel ply is way cleaner than when only fibreglass and resin goes on it. However, the wrinkle of the peel ply has same wrinkle and lump under, so we have to cover peel ply neatly as well.
marking the points where the floor goes on with a straight edge
bow chine coving which is pretty thick(big). Use same recipe of what we used for gap filling but put some more powder until it looks like peanut butter.
Space under the nose cone also can be solve by coving
marking floor
Putting the floor facing on pieces of wood, we used hot glue gun to glue the floor. It is a bit of work but this is sort of instruction of boat building for real world. At the Mackay boats, patterns for every marking was already made as a solid, draw a line through the pattern, bake the foam to fit into where it goes, glue adhesive powder to them(vacumming is ready to go before doing these), vacumn on, tap the ribs lining up and that's all.
Hot glue gun goes well in this case. Stick and elimination were nice and clean, we had to be quick because it cool down pretty quickly though. Hinge between chine and topside has to be filled with epoxy afterwards to prevent breaking the ribs.
We don't laminate fibreglass onto the bulkhead(frame 11) but we use this rubberise epoxy instead. This is somewhat different from the other ones, which is sticky and is like jam. It costs 10 times the other resin. It is mainly for structural use as shown on and for joint of hull and deck which is like the one that Mackay boats used when they do the joint. It sort of is said to be a super glue among the epoxy resins.
transferring the measurement of the bulkhead on the foam which hasn't enough size so that has to be glued both sides.
The first floor of the first floor glued up with hot glue gun. The floor is 40*30(8mm*4 sheets laminatin). We simply glue them with hot glue gun and later on we are going to use vacumn bag with resin which can migrate into them, which makes sense.
It's a baked bean stick. There are apparently no relation between the name and this, but it is a tool for transferring the shape which hasn't got the measurement.
Get ready to be glued up
After glueing four foams up, we taper the tip in 100mm of length. We are going to cove and get the edge round after setting all the floors up.
CUB of 40mm wide will go on the floor.
Being on board, Jun takes the shape with the baked bean stick.
marking
It's me. Hull inside it quite spacious but cockpit will be on actually.
redoing the collision bulkhead
The infusion yesterday didn't go well as it shows. Chris said if when there is a leak point, it won't go well but I don't know in this case. I should have asked...
Clamps for resin infusion
marking
Lance did another coving which is bigger than the former. Welding bid gets bigger where it goes critical point like which has bigger stress as well.
trasferrering the collision bulkhead on to cardboard finally
plum bob
girth
6-freedom
ring frame - floor
if the floor doesn't go exactly the way transverse, let it go.


댓글 없음:
댓글 쓰기