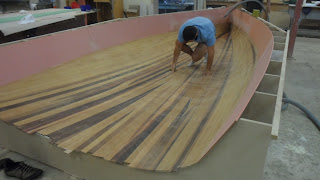
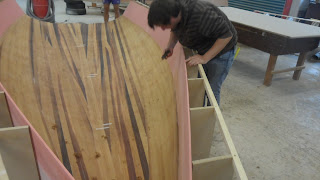
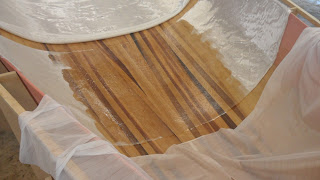
We laminated EDB today.
A picture taken this morning which looks neat and nice. We nailed on top of the topside not to be fell from the frame. A couple part was not fair which isn't that big deal but Chris also mentioned that the design should have thought about developable planking which means the variable direction of the planing has to be every direction not just one that has to be improved.
The girder glued yesterday looks good. It was not long enough so two parts glued together.
Sanding roughly but not too roughly. This is for getting rid of lumps just in case and the physical bonding with fibreglass.
Making a bevel board like this to cut off the excess part of the topside, we took the angle between deck camber and level line as well as topside and level line with using folding bevel. Frame numbers are on there. Sand some pieces of foam following the angle, smack on each frame and draw a line underneath.
Andrew is taking the angle. Marking every each frame, we drew one nice and fair line using a batten.
Chris's bevel board
Deck sitting on the topside like this picture(upside down), which edge has to be rounded. cove inside.
Pretty heavy. Compared to the last material that used before, the quality is good but still not the best.
capacity: 312g/m2 and 1270m of length
Tristan is planing the edge of chine to make it round, use sandpaper as well.
Andrew tried to use this but the tip shaft kept touching the foam so he dropped it.
We could have used a batten inside or outside of topside but nailed on excess section mentioned above.
dry laminating on the hull. The minimum of the lap is 40mm which we did actually but the shape of the hull wasn't like a cylinder the glass on top lapped over 100mm so we trim it which goes down another one.
Three of them sitting on hull
cut roughly following to the sheer. It has to be cut anyway and the remaining part folds down, which can make a gap.
laps
cover peel ply
We used ADR 246(part A)-laminating resin, infaction capable and ADH 28(part B)-laminating hardner. I asked Lance what infaction means and he answered showing this material that bachelor students are doing. Resin isn't gone directly on to the surface of material but with a hose connected to the vacumn bag.
Shown on this picture, to allow the resin slowly to spread on to the fibreglass, use some clamps on the hose, wait for proper time and this is said to be infaction.
glueing table. electronic scale, resin, hardner, small plastic buckets for careful measurement
mix the resin and the hardner into 4:1 ratio. This hardner is a slow one which can be cured with room temparature. Stiring up thoroughly, we spreaded this evenly with a roller. It was a bit thicker than the polyester at Mackay boats.
We can see hull through the glass with resin because it is glass. Female mould has pros and cons which is easy to be sit the planking on but hard to be covered the fibre glass on.
We need to mix some powder onto the foam because of filling the tiny holes on it with adhesive powder. Spread it with squeeses.
We especially have to focus on to the joint and he is coving. One thing that we should aware of is that make sure not to push thd coving down.
What was the reason we started laminating from the centre?
glueing history. It tells us how much glue we used, which was about 4.5kg in this case.
He is washing tools with thinner(normally acetone)
looks not bad
from stern
elongation
every second one
every third one
Why is the angle acute angle between topside and deck?
- to let the water flow easily out
- to get enough height of the cockpit side
- stronger
- for comfortable sitting when heeling
asterisk
substitute
roller handle
roller sleeves
chop strand mat
use your initiative


댓글 없음:
댓글 쓰기